Connect IQ screenshots are not only raw captures. They are product assets.
Developers often start with screenshots from a Garmin device, but the final images need to work in listings, documentation, release posts, and support pages.
The full workflow
The complete Connect IQ screenshot workflow usually has five stages:
- Capture the screenshot on a Garmin watch or device.
- Copy the BMP source file to your computer.
- Convert the BMP to PNG when a standard image format is needed.
- Place the real screenshot into a Garmin device frame.
- Export final assets at consistent sizes for publishing.
Skipping the last two stages often leaves you with a technically correct image that still looks unfinished.
Why raw screenshots are not enough
A raw screenshot can show the app UI, but it does not show the product context. Store visitors and users understand the image faster when the screenshot appears inside a device frame.
Framing also keeps multiple screenshots visually consistent across a release page.
Where BMP conversion fits
BMP to PNG conversion is the bridge between capture and publishing. PNG is the practical format for crisp UI screenshots, especially when the image contains small numbers, icons, and watch face details.
That is why the converter page lives at Garmin BMP to PNG Converter. It is the hub for the raw file conversion side of the workflow.
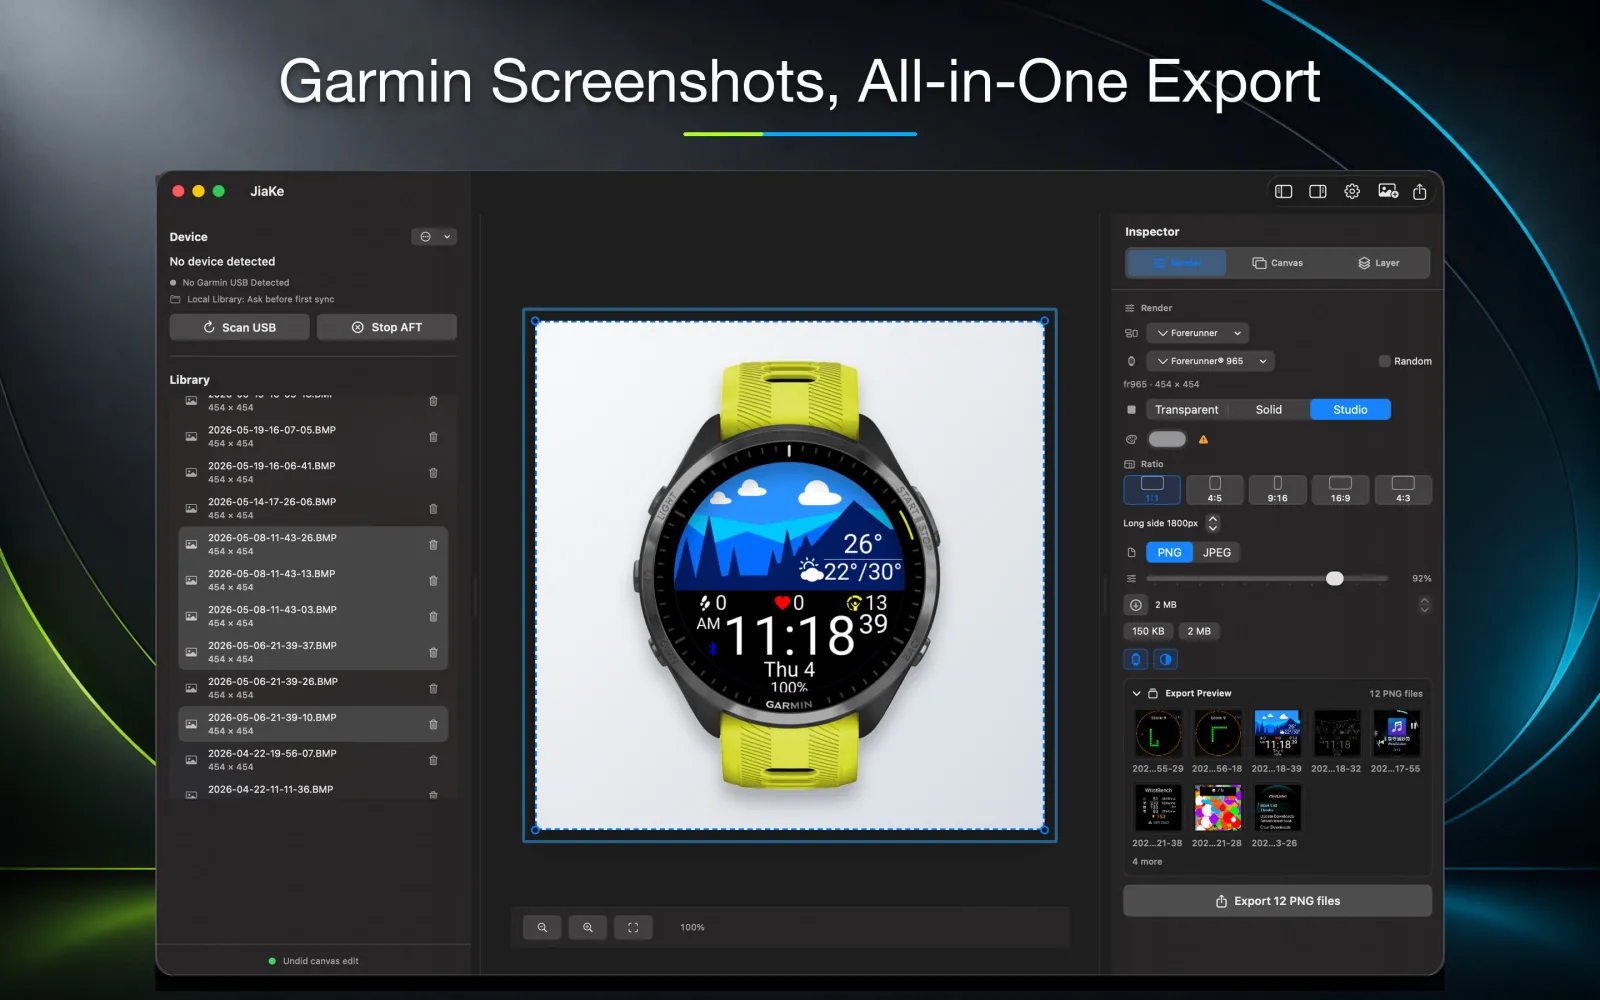
Where JiaKe.app fits
JiaKe.app handles the production side:
- import real Garmin screenshots
- apply device frames
- reuse style presets
- preview the final asset
- export PNG files for listings and docs
This replaces the repeated work of rebuilding masks, layers, spacing, and exports in a general design tool.
Recommended setup
Keep a simple folder structure:
| Folder | Purpose |
|---|---|
source-bmp | Original Garmin screenshot captures |
converted-png | Clean PNG versions of raw screenshots |
framed-exports | Final JiaKe.app exports for publishing |
That separation makes it easier to update screenshots later without losing the original source files.